
.png)

How To Add Multi Language Support To Webflow - TUTORIAL
WebFlow is a really great CMS platform, until a couple of months ago I never heard about it, once we had our new WebFlow website done, we start looking for a solution on how to support multiple languages, we thought WebFlow supports this feature as it's a pretty standard ability for CMS platform.
But, after a deep dive investigation, we notice there isn't a simple way to accomplish it. Some people suggested to duplicate the pages and then update the language - But this is a nightmare - after all, we went to WebFlow to make our life easier.
In this post, I'll show how we solved this problem.
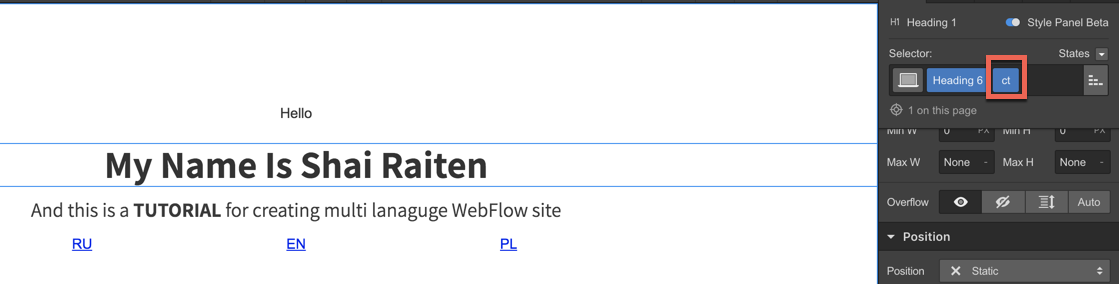
First, we need to add a class to every element on the web site that we want to translate, we added "ct" class (content translate) - Make sure you add it to the lower element (for example in a Text Link - don't add it to the Link element but the text - otherwise it will destroy the Link Style)
Then we created a Google SpreadSheet, I've used Google SpreadSheet to allow external editors to translate our site content.
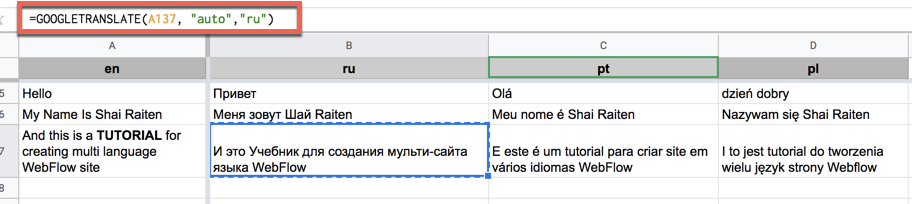
Just to prove the concept we used google translate function to translate the English content to Russian and 2 more languages.
=GOOGLETRANSLATE(A137, "auto","ru")
We manually copy paste all the content (text) from our web site into the Google SpreadSheet (I know there is some tool that does it automatically - but the entire copy & paste process took 5 minutes so we didn't need it).
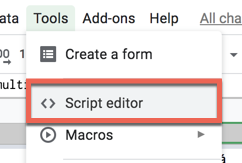
Now that we have all the site content ready and translated we need to export it to a JSON format, so open the Script Editor feature in Google SpreadSheet.
Use the following code, to build a JSON file compatible with i18next js, the output will be a JavaScript file with the translation object.
(The output of the script will a JavaScript object called - langs - we'll use it later to initialize i18next with the translations - Example: var langs = { ru : {"key" : "value"}})
function doGet() {
var result={};
var data = SpreadsheetApp.getActiveSpreadsheet().getSheetByName('Text & Translation')
.getDataRange()
.getValues();
var obj = makeObject(data);
var result = "var langs = " + JSON.stringify(obj);
Logger.log(result);
return ContentService.createTextOutput(result)
.setMimeType(ContentService.MimeType.JSON)
}
function makeObject(multiArray)
{
var languages = multiArray.shift();
var en = languages[0];
var obj = {};
for(var l=1;l<languages.length;l++){
var lang = languages[l];
obj[lang] = {translation : {}};
}
for(var j=0;j<multiArray.length;j++) {
var length = multiArray[j].length;
var source = multiArray[j][0];
if(source === "") continue;
for(var i=1;i<length;i++)
{
var translation = multiArray[j][i];
var tran = {};
tran[source] = translation;
obj[languages[i]].translation[source] = translation;
}
}
return obj;
}
Ok, we have the WebFlow elements ready with the "ct" class, we have a JavaScript file with the translations, but why a JS file and not a JSON file?
Well, WebFlow doesn't allow you to upload JSON nor JS file to your hosting program... So you can upload a JSON file to the external server to load the language file, but.... this will require CROS changes, so the easiest way is to upload the JS file that we created to an external server and load it from there.
Open Project Settings, Custom Code and paste the following code in the Footer Code section:
<script src="https://unpkg.com/i18next@15.0.4/i18next.min.js"></script>
<script src="https://unpkg.com/i18next-browser-languagedetector/i18nextBrowserLanguageDetector.js"></script>
Those lines will load i18next lib into our web site.
Next, we need to load the langs JS file and add it to i18next, we also added i18next browser language detection and query string support (I'll also show how to change language from buttons later - not just from query string)
$(document).ready(function(){
var script = document.createElement('script');
script.onload = function () {
i18next
.use(i18nextBrowserLanguageDetector)
.init({
load: 'languageOnly',
fallbackLng: false,
detection: {
lookupQuerystring: 'lng',
order: ['querystring', 'cookie', 'localStorage', 'navigator', 'htmlTag', 'path', 'subdomain'],
lookupQuerystring: 'lng',
lookupCookie: 'i18next',
lookupLocalStorage: 'i18nextLng',
lookupFromPathIndex: 0,
lookupFromSubdomainIndex: 0
},
debug: true,
resources: langs
}).then(function(t) {
updateContent();
});
};
script.src = 'PATH TO YOU -> langs.js';
document.head.appendChild(script);
});
</script>
Changing Language from Link - Again we thought that invoking JS from Link will be easy but seems we were wrong again, so we created Links with the language name as the text and added to each link the "lang-btn" class.
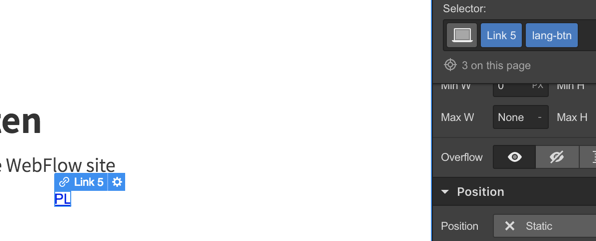
To change the language when the user clicks on the link, add the following code inside the "$(document).ready(function() { " function
$(".lang-btn").click(function(e){
var lang = $(this).text();
i18next.changeLanguage(lang.toLowerCase());
location.reload();
});
Now, let's add the updateContent function that will replace the original and translated text. As you can see from the code below I'm looking for every element that has the "ct" class, extracting the text and try to translate it against the Langs JS file that we load.
I've also added support for the input element to change the place holder of the fields.
function translate(key)
{
var result = i18next.t(key);
if(result === key)
result = i18next.store.data[i18next.language].translation[key];
return result;
}
function updateContent()
{
$(".lang-display").text(i18next.language.toUpperCase());
var items = $('.ct');
for (var i = 0; i < items.length; i++) {
var $item = $(items[i]);
var key = $item.text().trim();
var translatedValue = translate(key);
$item.text(translatedValue);
if ($item.is("input")) {
var place = $item.attr("placeholder");
if (place !== undefined) {
$item.attr("placeholder", translate(place.trim()));
}
}
}
}
And now, when clicking on the "RU" link we get:
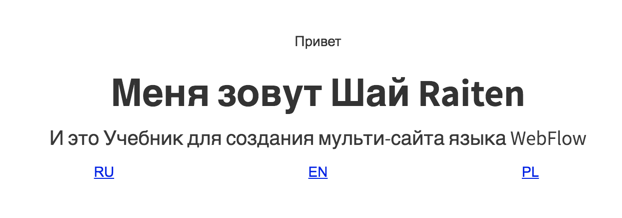
I hope this post helped you with getting your WebFlow support multiple languages more easily than duplicating pages.

Shai Raiten
CEO